Pages

Wednesday, November 14, 2012

Pinecone Garland DIY

Well, the festive season is upon us, and here is a simple DIY garland that can transition your home from Thanksgiving to Christmas. What I love about this garland is that it is a hardware store craft; I don't know about you but I love going into hardware stores and imagining what I can do with non-crafty supplies.


Supplies: Package of small screw eyes, pinecones, twine and scissors (they didn't make it into the picture, rats!) 


Twist the screw eye into the center of the pinecone. It is pretty easy, but you do have to use a bit of gentle pressure. My finger tips were just a little bit sore after doing all of these.


If the screw is a little bit tight, you can use a pair of scissors or a chopstick to help twist it into the pinecone. Once all of the pinecones have the screw eyes, tie them onto a length of twine. I cut a 7 foot piece of twine and I tied the cones about every 6 inches.


Ta-da! An easy pinecone garland, if you want to get even more festive you can paint the pinecones gold or silver or add glitter to them.

Wednesday, October 31, 2012

Happy Halloween!


Today is the Big Bad Wolf's first time trick or treating, I think he's going to make the cutest wolf around. We decided to make it a family affair and I am going as Little Red and D. is going as the woodcutter. For baby's costume, I wanted to get him this sweet one from etsy, but the price ($55.00) was a little too steep for me. So I got some fleece from Joann Fabric, which was running a great sale and I just figured out a pattern and made Little Baby this wolfie costume for a whopping $2.70. I must say, I am a bit proud of myself. *Pat self on back* I am new to sewing and I was a bit doubtful of my skills, but I am happy to have pulled it off and it looks strikingly similar to the one I found on etsy. My cape is the bottom of a skirt that I cut off a long time ago and the hat was out of my collection. Yes, I do wear this gnome/pixie/Little Red hat on a regular basis when it is chilly outside. :)

Wednesday, August 22, 2012

On Having Less

My whole life I've been, umm what do you call it...a pack rat. Yes, that is the correct term. Now I've never seen the show Hoarders, but I've heard enough about it and something about that show kind of resonates with me. I can understand how you can get to be that way.

(source)

 Growing up I was kind of like Templeton the rat, I used to squirrel away anything I deemed useful...chunks of wood, pieces of Styrofoam, rocks etc. and I kept them under my bed! Being crafty made me never want to pass up a potential craft object, I guess I thought I could make something real good out of a crumbling, noncompostable hunk of foam. I always liked things cluttered and "lived in" looking. My boyfriend (now husband) would always be appalled with the state of my bedroom because stuff was strewn all over the floor. He asked me how I did not trip in the middle of the night when I navigated to the bathroom. I told him I had radar feet.


Now we'll fast forward a couple of decades from my Styrofoam hoarding days and I find myself wanting to purge of all the excess I have. I see I'm not the only one thinking this way, it is kind of a trend going on right now. Oh how I dislike following trends, but I hope this one sticks with people. I'm glad knowing that I'm not the only one who is so tired of excess, I find myself wanting to live simply. Blame it on my  living in Oregon, having a new baby and not wanting all the "stuff" that goes with that, growing a vegetable garden this year, the Woody Guthrie play I saw last week, the fact that the 3 of us are moving into a one bedroom apartment, or living the last 6 months with my grandparents who grew up during the Great Depression.

But wherever my desire to declutter is coming from, I'm glad it's come. Having a lot of stuff does not make us more happy, it is really just burdensome; we have to pay to take from place to place with us...pay to ship, pay to store and ultimately it meets its demise in a trash heap somewhere. Now, this isn't to say that I want to live in a tiny four walled room without a stick of furniture, it just means I want to be intentional with what I purchase and what I bring into my home. I don't want to have stuff just to have stuff. I find my whole aesthetic is changing and I'm being drawn to interiors like this


1.redcouch

Wow! Where's all the stuff on the floor?

See, while it's not sparse, it's not really cluttered. At least compared to what I'm used to.

So all this is to say that I really don't need to keep that Home Alone Talkboy from a million years ago (this just in, cassette tapes aren't coming back!) For those of you who stuck around to the bottom of this post, thanks for letting me ramble and in the words of the pioneers of old just remember...


"Use it up, wear it out, make it do, or do without!"

Saturday, August 18, 2012

Cute Packaging for Earrings

When giving earrings as gifts, it is best to make sure that they are packaged, you don't want to just hand someone a jumbled mess of earrings and say "Happy Birthday". True, earring that you buy at the store already come packaged, but what about those one-of-a-kind finds from yard sales or your own handmade creations that you want to gift someone? Well, here is an easy (and cute!) packaging idea.

Supplies: Cardstock, 1/8 inch hole punch, scissors, washi tape.

Cut cardstock into small rectangles, cover the top half with piece of washi tape, punch two holes in cardstock.

And here you have some sweetly packaged piggie earrings.


To keep the earrings from falling out, I cut two thin strips of washi tape to cover the earring backs. Washi tape is perfect for this because it is easily removable and won't leave any sticky residue.


Have fun making this easy packaging!


Saturday, August 11, 2012

Fruits of Our Labor

D. and I are very fortunate to live in a place that places a strong emphasis on community, environment, and sustainability. Our little town has several community gardens and we were lucky enough to score a plot this year. Whooo, hoo! I heard the average wait time is a year, but we got a plot after just a few months. 

The view from the garden. Absolutely breathtaking.
Now D. and I pretty much knew zilch when it came to gardening, we kind of thought we could plant whatever we wanted, wherever we wanted. Well, that is not the case. We've enjoyed having our plot and have learned a lot along the way. There is just something very human about connecting to the earth and seeing how food is grown. 


Today's haul: cauliflower, anaheim peppers, eggplant and jalapeños. We watered the jalapeños too much, as a result we got those cracks in them known as "corking".  See, always learning...

It's important to see the work (and knowledge) that is required to produce food that we  so easily take for granted. It makes you that much grateful for every lettuce leaf you eat and every piece of broccoli that you munch on. 


Though my gardening skills are limited, it is something I definitely want to pass down to little baby. I can already imagine him digging in the dirt and eating tomatoes right off the vine.


Sunday, July 1, 2012

Friday, May 25, 2012

Pinterest Projects: Rain Cloud Mobile

 Projects

As we all know, Pinterest can be a great tool for collecting recipes, projects and all around inspiration but my boards have a way of collecting virtual dust. I can go crazy pinning things and then do nothing with them, so my latest "feature" (I should not say feature because that requires frequent blog posting) will be me finding a project on Pinterest and then recreating it. First up this rain cloud mobile:


Super cute mobile but the blog was in French, thanks to google translator though, I was able to pretty much figure out the instructions. I did not have the same materials that was used to make the mobile, so here's my spin on the project.


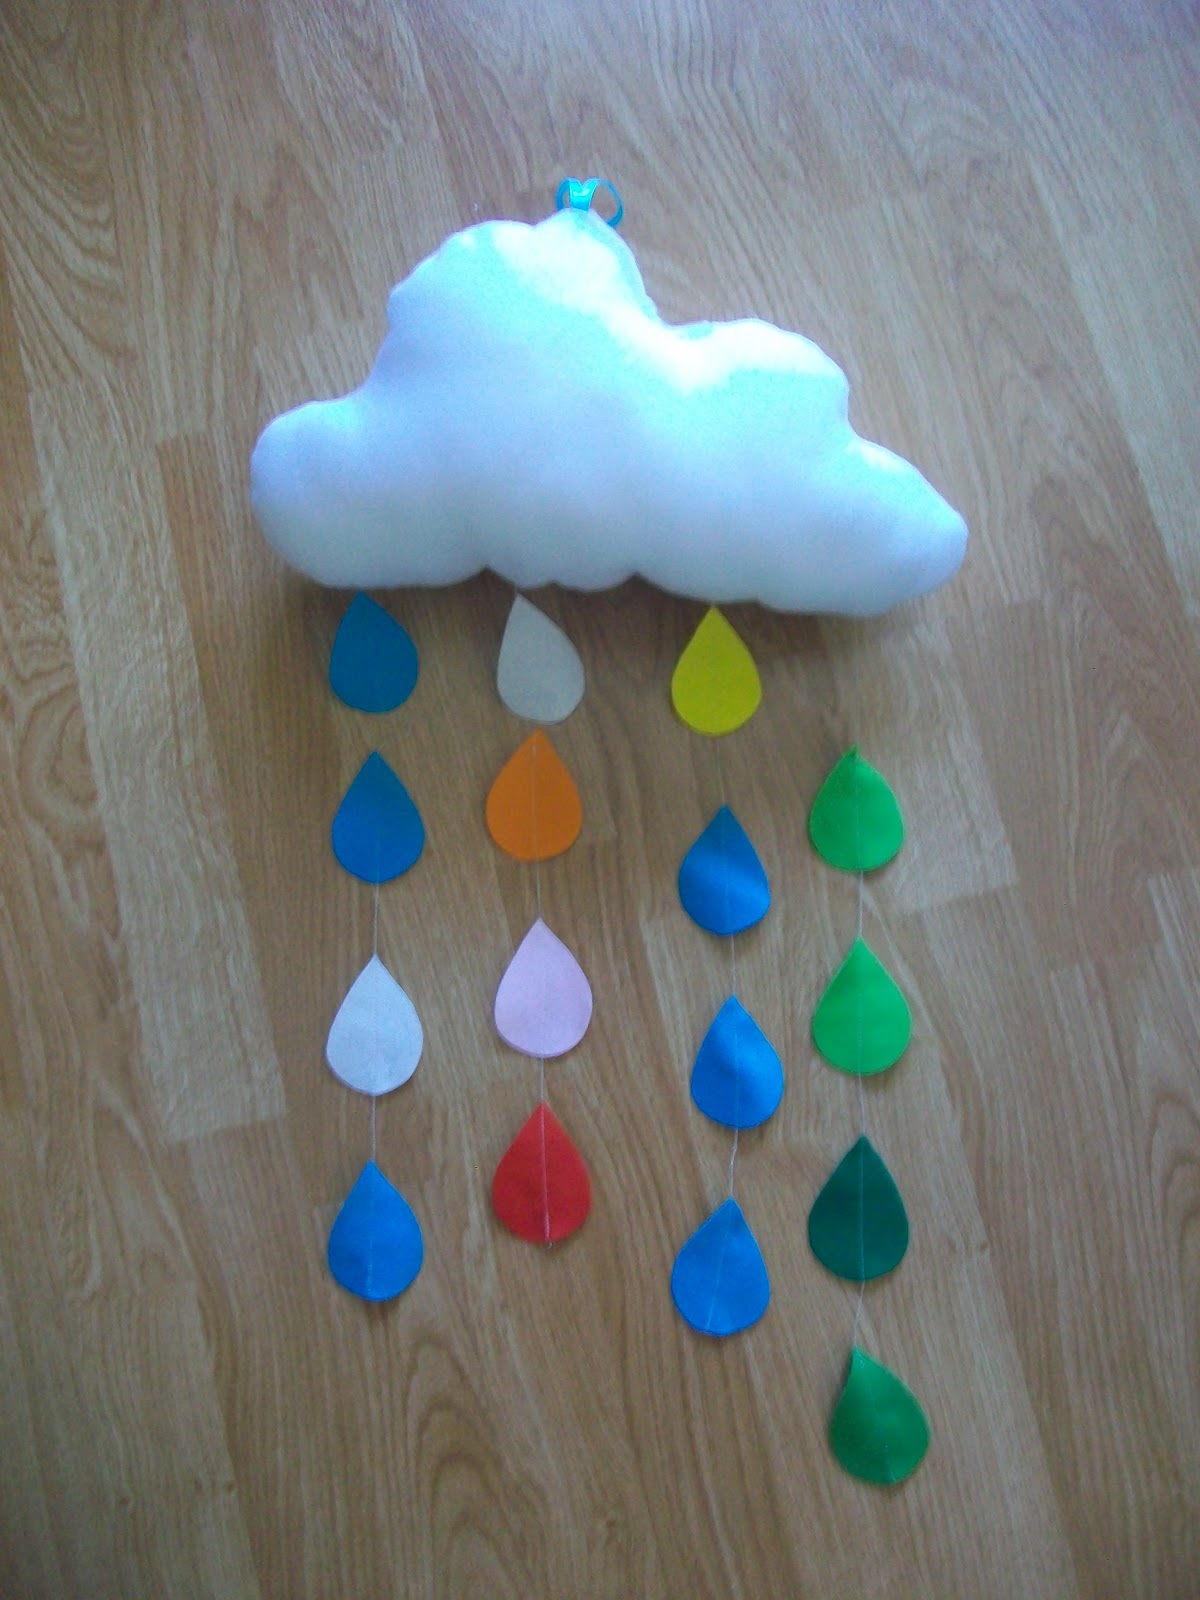
Cut two cloud shapes out of quilting batting (I scored this for free at a church rummage sale!) and cut out raindrop shapes from different colored felt.


Arrange raindrops into desired color combination and sew them into strands. I christened my new sewing machine by sewing raindrops, maybe someday I can tackle more adventurous projects... Sew around cloud leaving a small opening to stuff with polyfill. Sew a ribbon loop (not shown) on top of cloud and tie raindrop strands to base of cloud.


Ta-da! The finished product, my little sonny sure likes looking up at it and watching the raindrops sway back and and forth.

Related Posts Plugin for WordPress, Blogger...